
VPN
Windows / MacOS / iOS / Android Setup-Guides
Mac OS X - allow extension
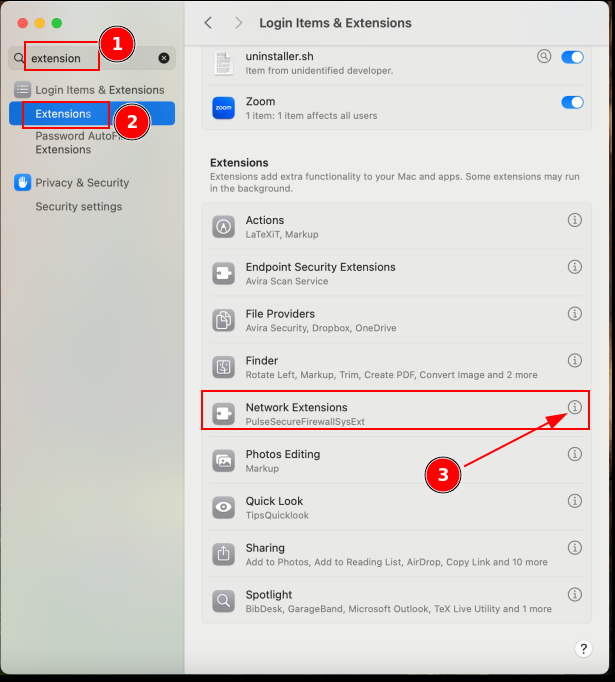
- Öffnen Sie „Systemeinstellungen“ und navigieren Sie zu „Allgemein“ > „Anmeldeobjekte & Erweiterungen“.
- Scrollen Sie dann nach unten bis zum Abschnitt „Erweiterungen“ und „Netzwerkerweiterungen“ (erkennbar am grauen Puzzleteil-Symbol).
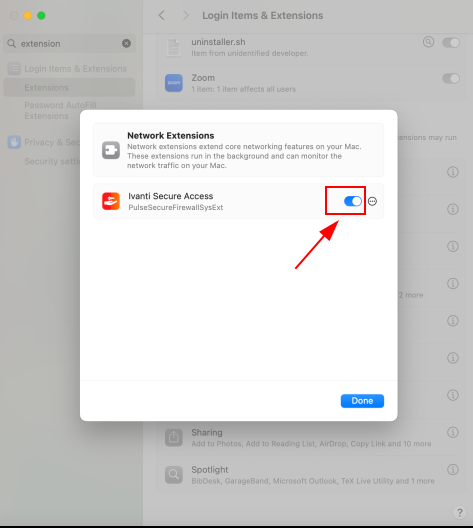
- Klicken Sie dort auf das Informationssymbol („i“) neben der Ivanti Secure Access-Erweiterung und aktivieren Sie die Erweiterung, um den Zugriff zu erlauben.
Linux Ubuntu Setup-Guide
Installation
* Preparation:
# Installing the needed libraries
$ sudo apt-get install libnss3-tools
[/home/b/alrutz/Documents/1.png]
- Ubuntu - Debian: Download the file ending with ".deb"
[/home/b/alrutz/Documents/3.png]
* Install Avanti Client
$ sudo dpgk -i pulsesecure_'version'_amd64.deb
Configuration
- Start avanti client.
- Press the Plus-Sign to add a Connection:
[/home/b/alrutz/Documents/4.png]
- The connection should now be visible under "Connections" --> press "Connect" to activate the VPN
Troubleshooting
- Problem: Chromium embedded browser (cef) is not installed on this machine
* Fix:
$ cd /opt/pulsesecure/bin
$ ./setup_cef.sh install

# Execute this command to verify the installation: {{{
$ ./setup_cef.sh check_installed
- Retry connecting
Verifying if the VPN is active
- Open this page IP-check Before connecting to the VPN --> make a note of the IP shown.
- Now connect to the VPN and refresh the page --> if the IP shown is different from the one you made a note of, it most likely means that the VPN is active.
No comments to display
No comments to display