Screenshot
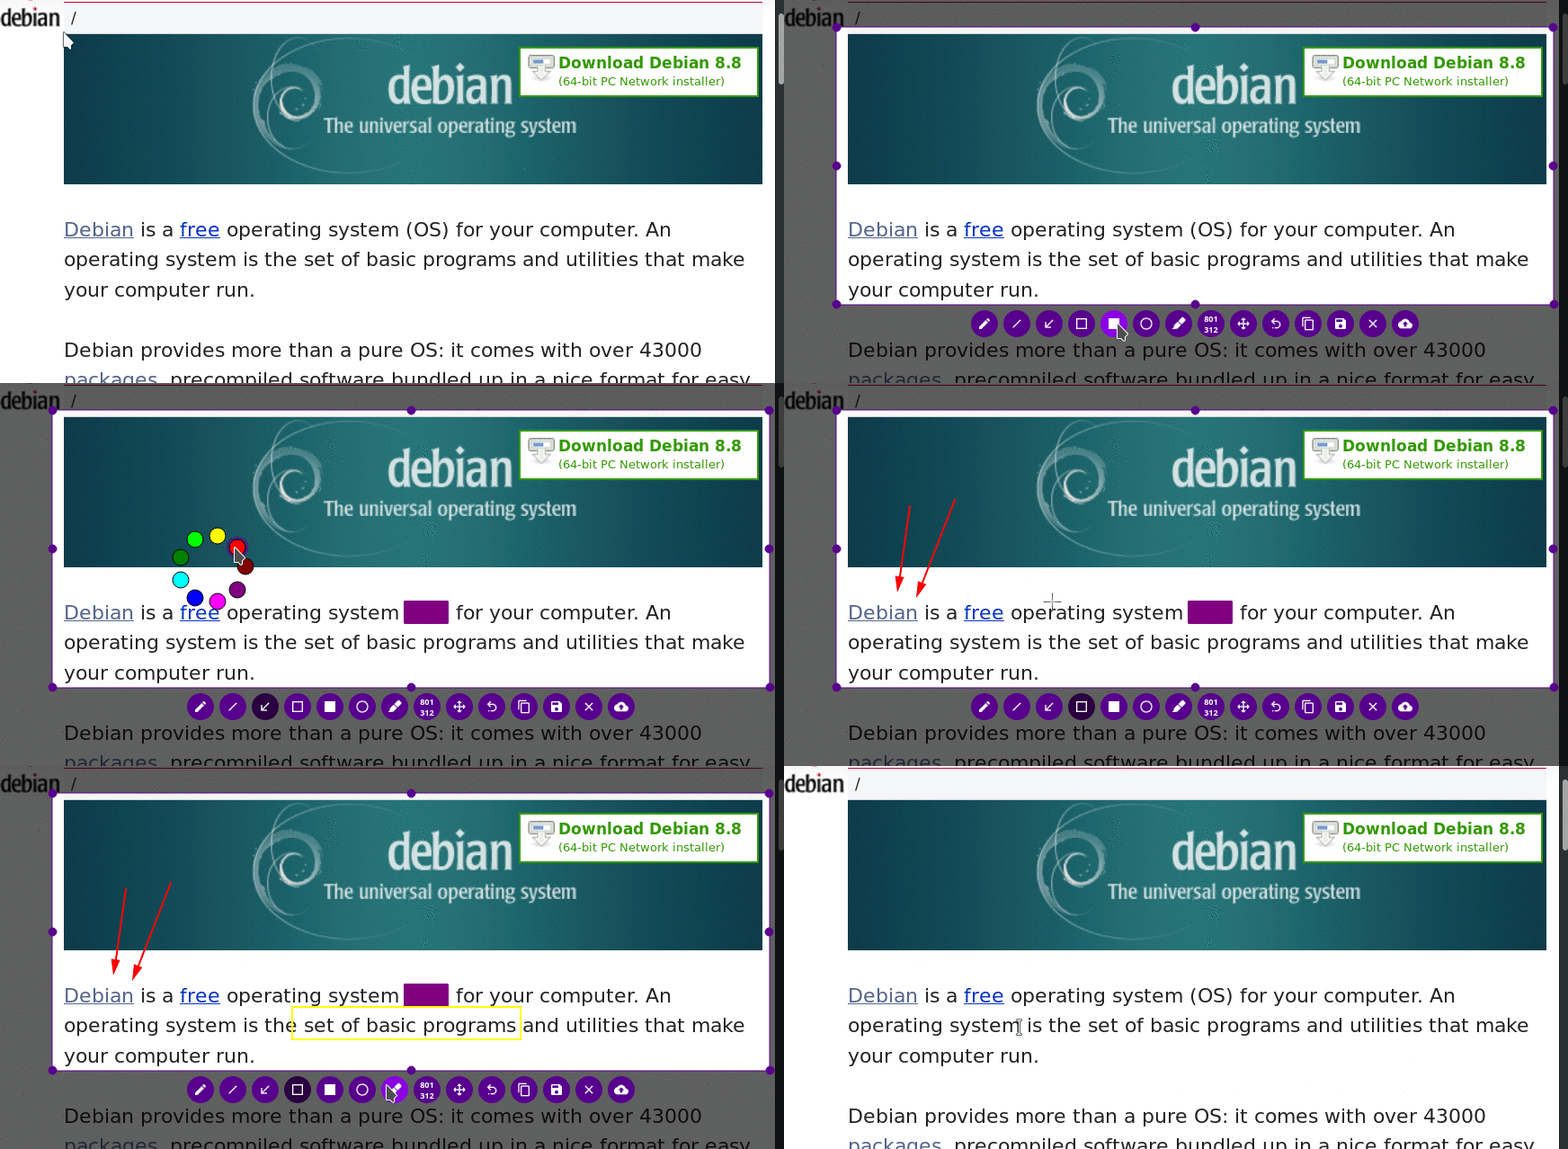
Standard tool: flameshot, i.e. screenshot with graphical editor; Applications > Graphics > Flameshot
(mate-screenshot) Applications > Accessoires > Take Screenshot
When you press Print-Screen (key: 'prt scn' or 'print' or 'druck') the screen will get a dark overlay and you can select the area you want to screenshot and immediately start editing the image.
Features:
- Adjustable selection
- Copy to clipboard or save to disk
- Highlight or blur parts of the screenshot
- Place markings such as arrows, circles and rectangles on the image
Optional direct upload (no account needed) to http://imgur.com to share the screenshot online

command line
For more advanced user, 'scrot' is a command line tool that takes screenshot of either fullscreen, current window or selection area. You can bind this command to the printscreen key if you visit System > Hardware > Keyboard Shortcut and scroll down to the custom keybinds. There you will see the Printscreen function and can edit it to execute one of those:
# Create a screenshot of the entire screen in your home directory with a datetime stamp
scrot ~/%y%m%d_%H%M.png

# Create a screenshot of the current window in your home directory
scrot -ub ~/%y%m%d_%H%M.png

# Opens a selection tool to select the area to screenshot
scrot -s ~/%y%m%d_%H%M.png
For advanced info on scrot type man scrot in a terminal.
Workflow to put images to the Wiki
- Activate the window to take screenshot of (left mouse click inside window).
Press Alt + Print Screen
- Save it.
- Default destination is your 'Desktop'. If you already have a file called 'Screenshot.png' there, a number will be appended to the filename.
- Wiki:
- Log into the wiki homepage.
Select the desired page (view, not edit!!!).
Click on Attach File (bottom of the page).
In File to uplaod select the file and press Upload.
Copy the command [[attachment:screenshot.png]] to the clipboard.
Edit the page: choose Text mode not 'GUI Mode'!
Insert the command [[attachment:screenshot.png]]. Replace [[ with {{ and ]] with }}
- Save the work.
