Thunderbird
Sending Mails (SMTP) over an SSH tunnel
It is possible to send mails from outside our university using our mail server over an SSH-tunnel. To do this, you need two things:
- a SSH client like Putty or SSH Secure Shell
- an additional smtp server entry in Thunderbird for our mail server
The configuration of both the ssh client and thunderbird is described below. I've you are an advanced user and used to using SSH, especially in a shell, scroll down to get a very short explanation how you can establish the SSH tunnel using the ssh comandline tool.
Configuring the SSH client
As an example, we will demonstrate here how you have to configure SSH Secure Shell to build up an SSH tunnel to our network allowing you to use the math mail server.
Download and install SSH Secure Shell. You can download it from this location, it is free for non-commercial use.
Start SSH Secure Shell. If you use it for the first time, you need to create a new profile. Click on "File -> Profiles -> Add Profile ..." and enter a name for your profile.
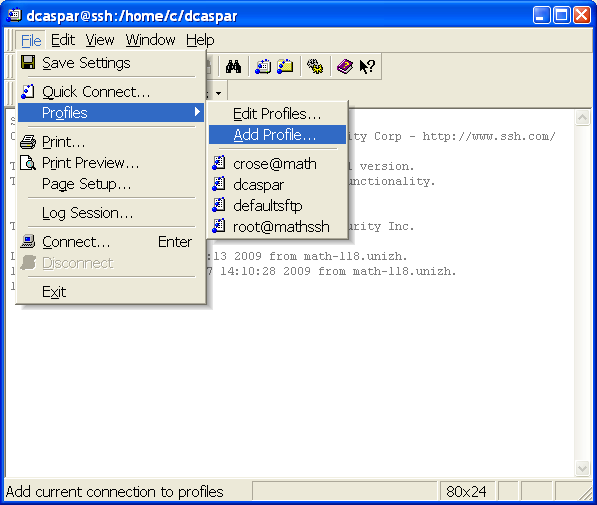
In the example, we created a new profile called "dc".
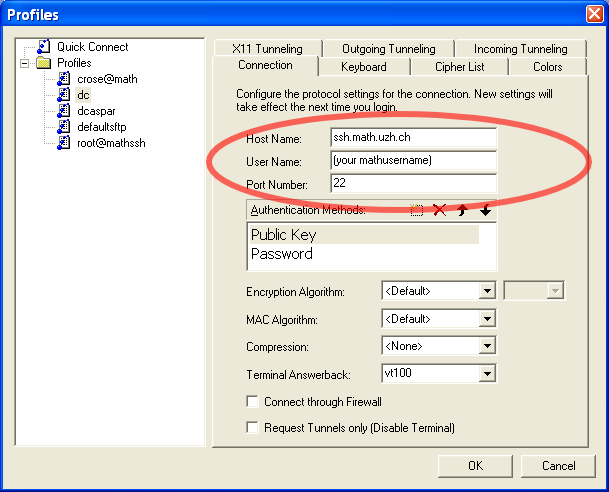
Now, you need to configure the profile just created. Open the configuration windows via "File -> Profiles -> Edit Profiles ..." and select your profile from the displayed list. Make sure that the "Connections"-Panel is shown on the right side. Fill in the host name, your username and the portnumber as shown in the following table. The other options should work fine.
Host Name: |
ssh.math.uzh.ch |
User Name: |
(your mathusername) |
Port Number: |
22 |
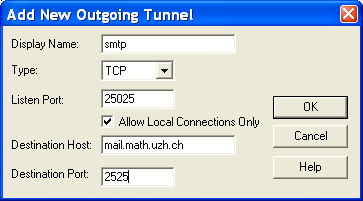
Now select the "Outgoing Tunneling"-Panel on the right and Click on "Add...". In the opened window, provide the following information as described bellow:
Display Name |
a name for this tunnel, e.g. "smtp" |
Type |
TCP |
Listen Port |
Enter a port above 1023, e.g. 25025 |
Destination Host |
mail.math.uzh.ch |
Destination Port |
2525 |
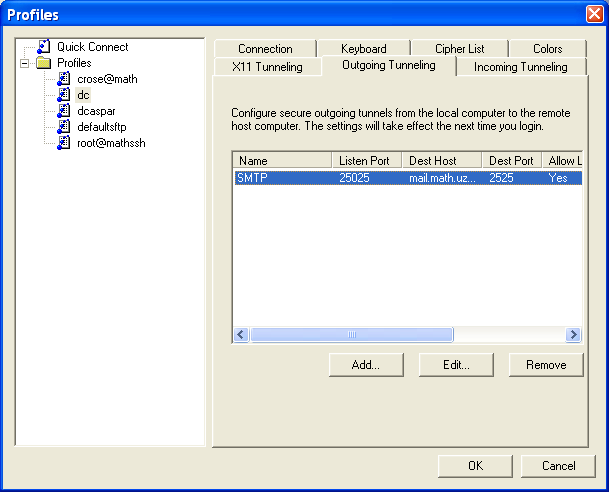
Click two times on "Ok" to store the Tunnel and close both the "Add New Outgoing Tunnel" window and the "Profiles" window.
Configure Thunderbird
Next, you need to configure Thunderbird to use your SSH tunnel. Open Thunderbird, open your account settings via "Tools -> Account Settings..." and select "Outgoing Server (SMTP)" on the left.
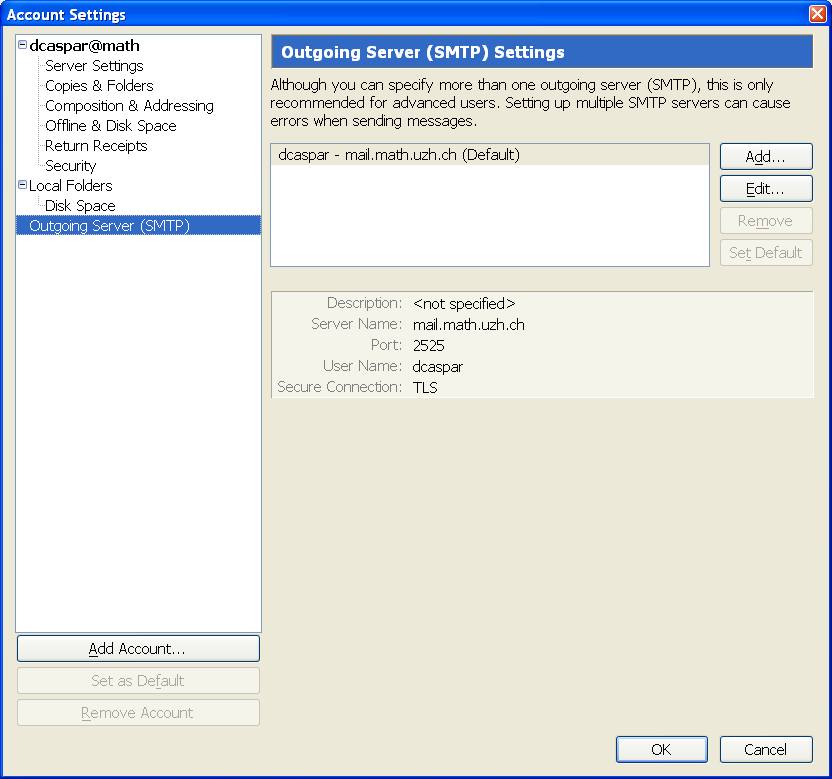
Now, click on "Add..." on the right to bring up the "SMTP Server" window. Enter the following information:
Description |
Enter a description/name for this smtp server (optional) |
Server Name |
127.0.0.1 |
Port |
the port you entered as listening port for your SSH tunnel (see section above), e.g. 25025 like in the example |
Check "Use name and password" and enter your math username. Select "TLS" under "Use secure connection".
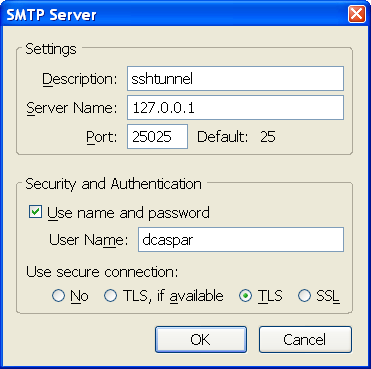
Click "Ok" two times to close both windows and save the configuration. You are now ready to use SSH tunneling to send your mails.
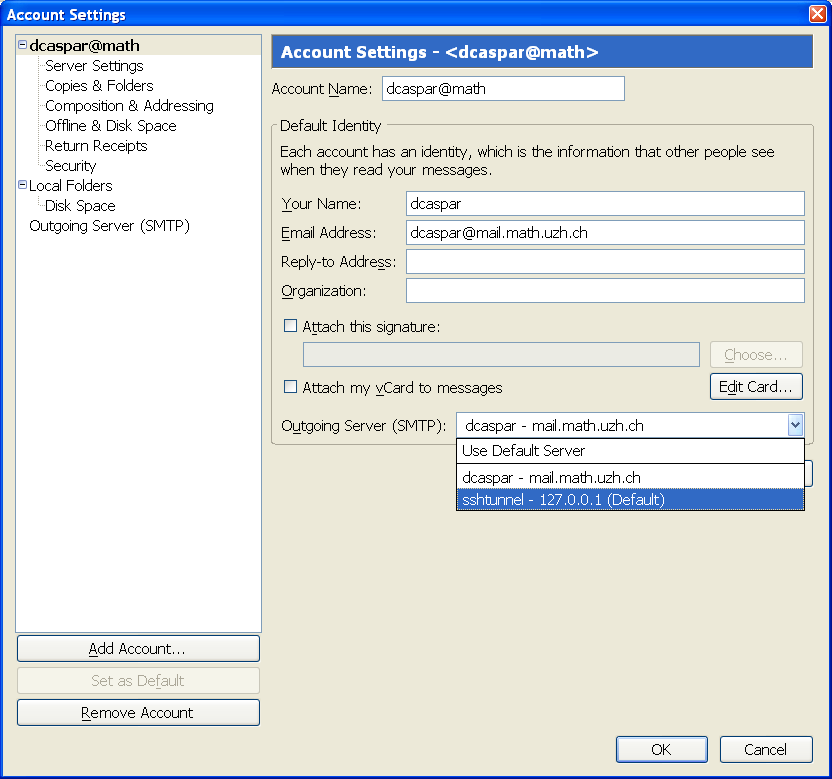
Note: You can change your current smtp server for all of your accounts separately, simply open the account settings and select your account name on the left and change the server under "Outgoing Server" on the right.
Sending mails over the SSH tunnel
To send mails over the SSH tunnel you need to connect to our network with your SSH client. In SSH Secure Shell, simply select your profile from "File -> Profiles -> [name of your profile]" and SSH Secure Shell will try automaticaly to connect to our network. Enter your password if you are asked for it.
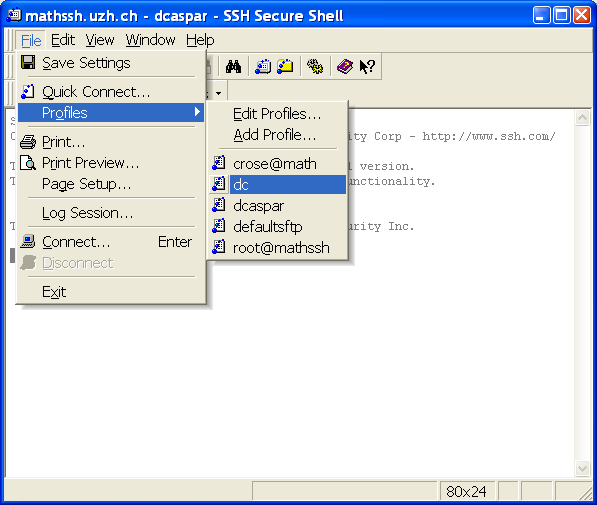
SSH Secure Shell tells you in the lower left corner if you are connected to our network or not. If you are connected, write your mails as usual.
If you're done with your mails, simply close SSH Secure Shell.
Establishing the SSH tunnel for experts
If you are used to using SSH, especially via the ssh command line tool in a shell, you can simply create the necessary SSH tunnel with the following command:
ssh [username]@ssh.math.uzh.ch -L [ListeningPort]:mail.math.uzh.ch:2525
As an example, user dc creates an SSH tunnel with listening port 25025 with the following command:
ssh dc@ssh.math.uzh.ch -L 25025:mail.math.uzh.ch:2525
