Contents
To share the screen of your ios device we present the following two solutions:
Recommended. Free 30 day trial, 11 EUR for a permanent license |
|
Requires wired connection and Mac Notebook. Is easy to set up. |
|
Works wireless but also requires a Mac Notebook. |
Airserver
Install AirServer (30 days for free, 11 EUR for a permanent educational license buy) and start it.
- On the ios device:
Swipe up from the bottom bezel to open the Control Center.
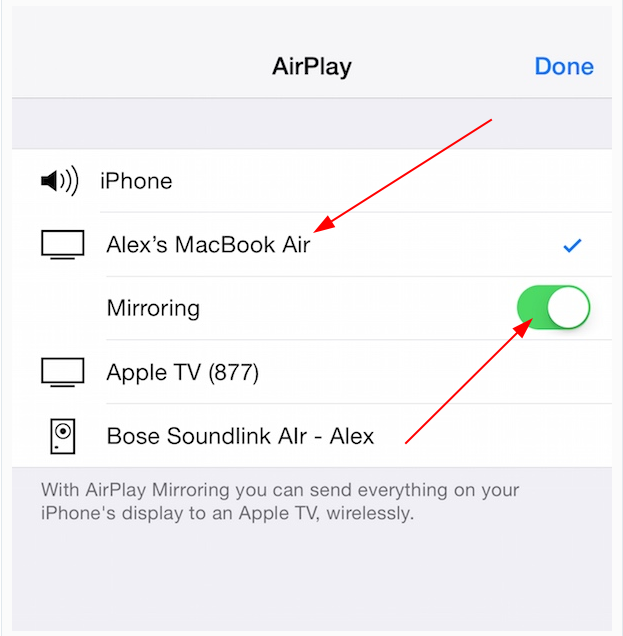
From the Control Center click AirPlay. Choose the Mac to which you wish to mirror from the list, then enable Mirroring.

QuickTime
Connect the iOS device to the Mac via a Lightning-to-USB cable.
Note: This connection may cause iTunes and/or Image Capture to automatically launch. Those programs may start trying to sync with the iDevice, and create lag. So be sure to close those applications before moving forward.
Mac Notebook: Launch QuickTime. QuickTime will bring up a filepicker menu. The goal here isn't to play an existing file, so click Done.
Mac Notebook: From the QuickTime menu bar, click File, then New Movie Recording.
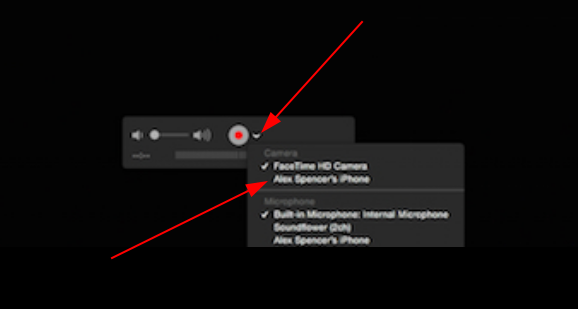
Mac Notebook: The default input device will be set to the iSight camera. To change it to the iOS device, click the down arrow next to the record button. Then select the iOS device from the camera list. The device's screen will instantly appear and any actions taken on the device will be mirrored to the Mac's display.

Reflector App
- Requirements:
A paid software must be installed on the Mac. But Reflector does offer a free seven-day trial.
Both the Mac and iOS device have to be connected to the same Wi-Fi network!!
- Steps on the Mac Notebook:
Open the web browser and go to https://www.airsquirrels.com/reflector/try.
Click Download FREE for 7 days bellow "Reflector 3 for Mac"
open the downloaded file.
Drag Reflector to the Applications folder.
Launch Reflector.
Click Try Reflector.
- You won't see any windows or other application screens appear. Reflector will live in the dock until an iOS device is connected to it!
- On the ios device:
Swipe up from the bottom bezel to open the Control Center.
From the Control Center click AirPlay. Choose the Mac to which you wish to mirror from the list, then enable Mirroring.

