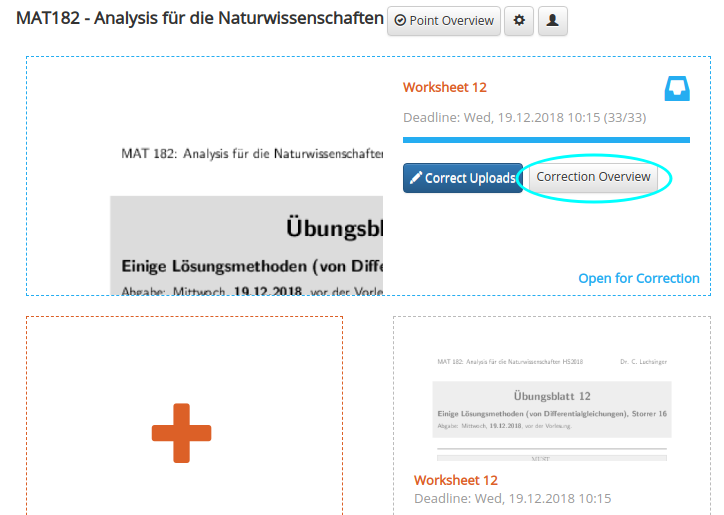
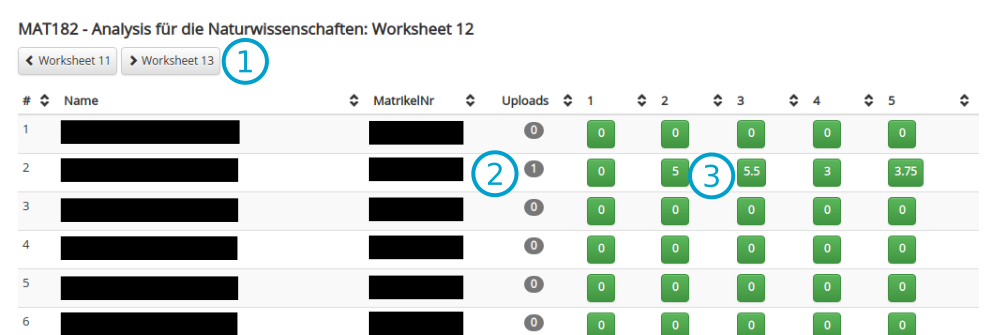
The Correction Overview displays just the students and exercises assigned to you for correction. It also gives you a quick overview if you have corrected every exercise assigned to you.
- Allows you to switch between Worksheets
- Shows you how many files the student has uploaded.
- This button links directly to the correction view of the student at said exercise. The button is blue without a number when you haven't given any points and turns green with the number of points after you have corrected the exercise.
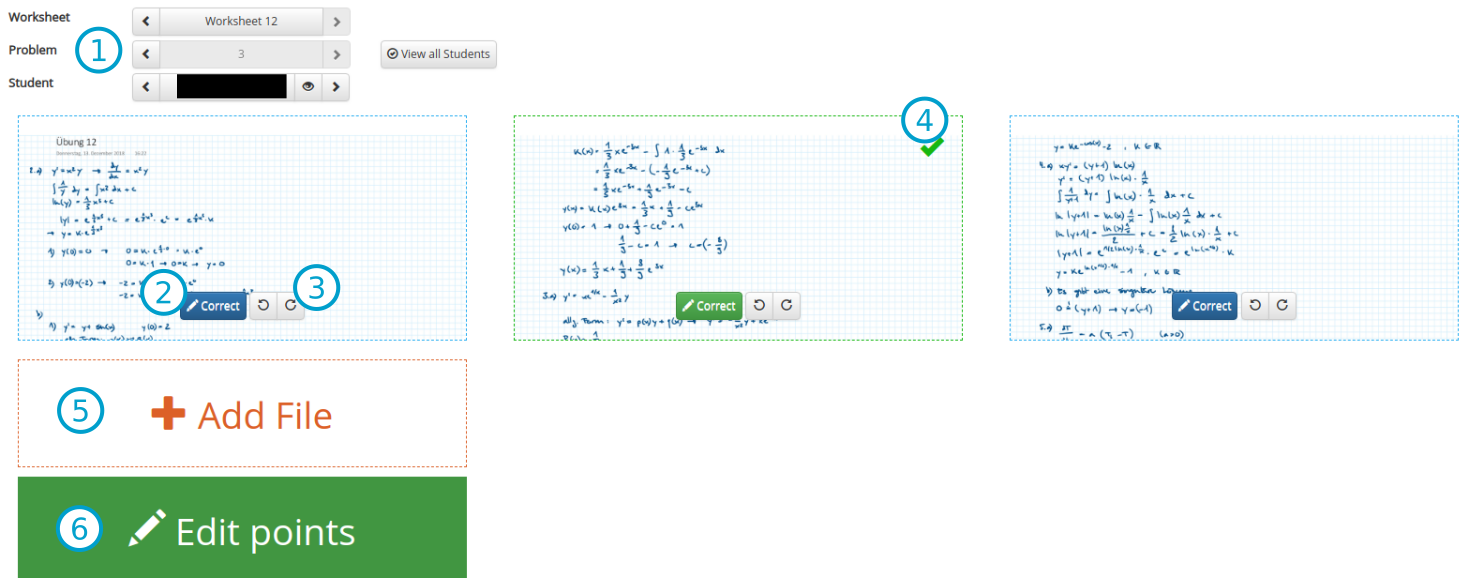
Here you see all the files a student has uploaded to a given worksheet. Note that if you divided each worksheet in different exercises, all uploads are shown all the time. You have to pick out the correct upload for the exercise yourself. It is helpful to ask students to write the exercise number of a sheet at the top of each page.

- Here you can switch between Worksheets, Problems (Exercises) and Students. The eye next to the student lets you see the corrections you did from the student's perspective. The View all Students brings you back to the previous view, where you see all your assigned students.
- This button brings you directly to the annotation form, where you can annotate the page and leave your notes for the student.
- The two buttons allow you to rotate the page, if it was uploaded sideways.
- The green border and the completion mark show that this page has been corrected.
- In case the student could not upload a file and send it to you per email, you can add it here.
- This button is blue with the text "Give Points" when the problem has not been graded. As soon as there are points assigned, it switches to green with the text "Edit Points". Use this to grade the exercise after you left your notes on the pages.
In this form you are able to give feedback to the student by writing directly on the previously selected page.
- The Next Page button saves your current annotations and switches to the next page. This is recommended if you have to annotate multiple pages for an exercise.
- Edit Points / Give Points saves your current annotations and switches directly to the grading form.
- Back to Overview saves your changes and brings you back to the correction view.
- Those buttons from left to right: Save, Close current page (allows you to leave without saving), delete annotations on this page (not the page itself, just your notes!)
- Downloads the original File, usually a PDF or an image file. In case of a PDF, multiple pages can link to the same file.
- Drawing tools, see below for more specific information.
- Select a color which most drawing tools use.
- Drawing area.
Below the Drawing area there is an optional text box for a normal written comment that will be displayed to the student, if filled out.
- A pencil like tool, that allows you to write or draw on the page.
- A text marker like tool, that allows you to highlight text on a page.
- A collection of Emojis you can drag and drop on the paper. As soon as you have placed them, you can resize and rotate them.
- Draws a semi transparent rectangle, useful to mark an area.
- Places a text inside the drawing area, which can be edited, resized, rotated and moved afterwards.
- Allows you to move the view, useful when zoomed in.
- Deletes the currently selected element. Can also be done with the delete key on the keyboard.
- The magnifier glass allows you to zoom.
- The pointing finger allows you to select your drawing and other objects you placed inside the drawing area. Useful to delete wrong entries or move/resize them.
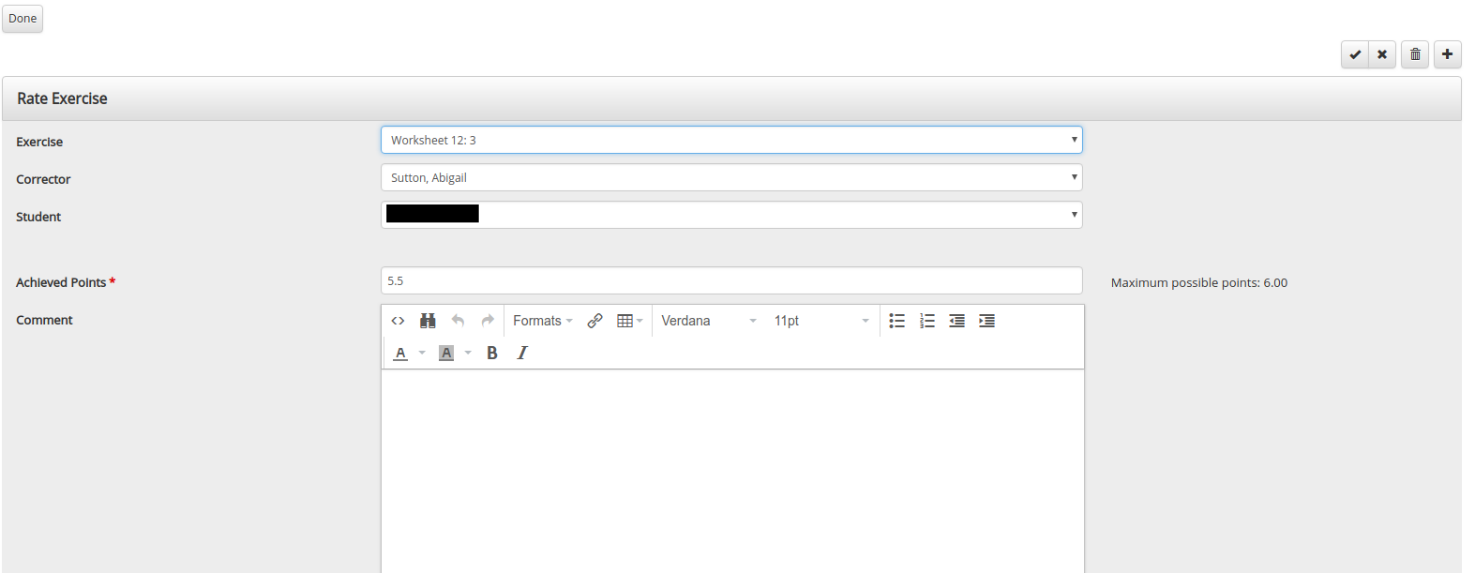
This form allows you to give points to the exercise. It also allows for an additional comment.
Please note that a correction is only viewed as done when the points have been given. Use the button with the check mark when done to save or press done in the top left.
Code and Textfiles are displayed with the dark grey background, to make them stand out from normal pages. The text above is the filename and the comment underneath is the optional comment a student can leave when uploading a document.
Click on Correct to start the correction.
In this view, simply click on a line you want to write a comment beneath and an editor will open. Click on send to preview the comment.
When all comments are set, scroll back to the top and either click on next page or give points to save your changes.
Comments can be edited or deleted at any point.


