screenshot
- Standard tool: flameshot, i.e. screenshot with graphical editor; Applications > Graphics > Flameshot
- (mate-screenshot) Applications > Accessoires > Take Screenshot
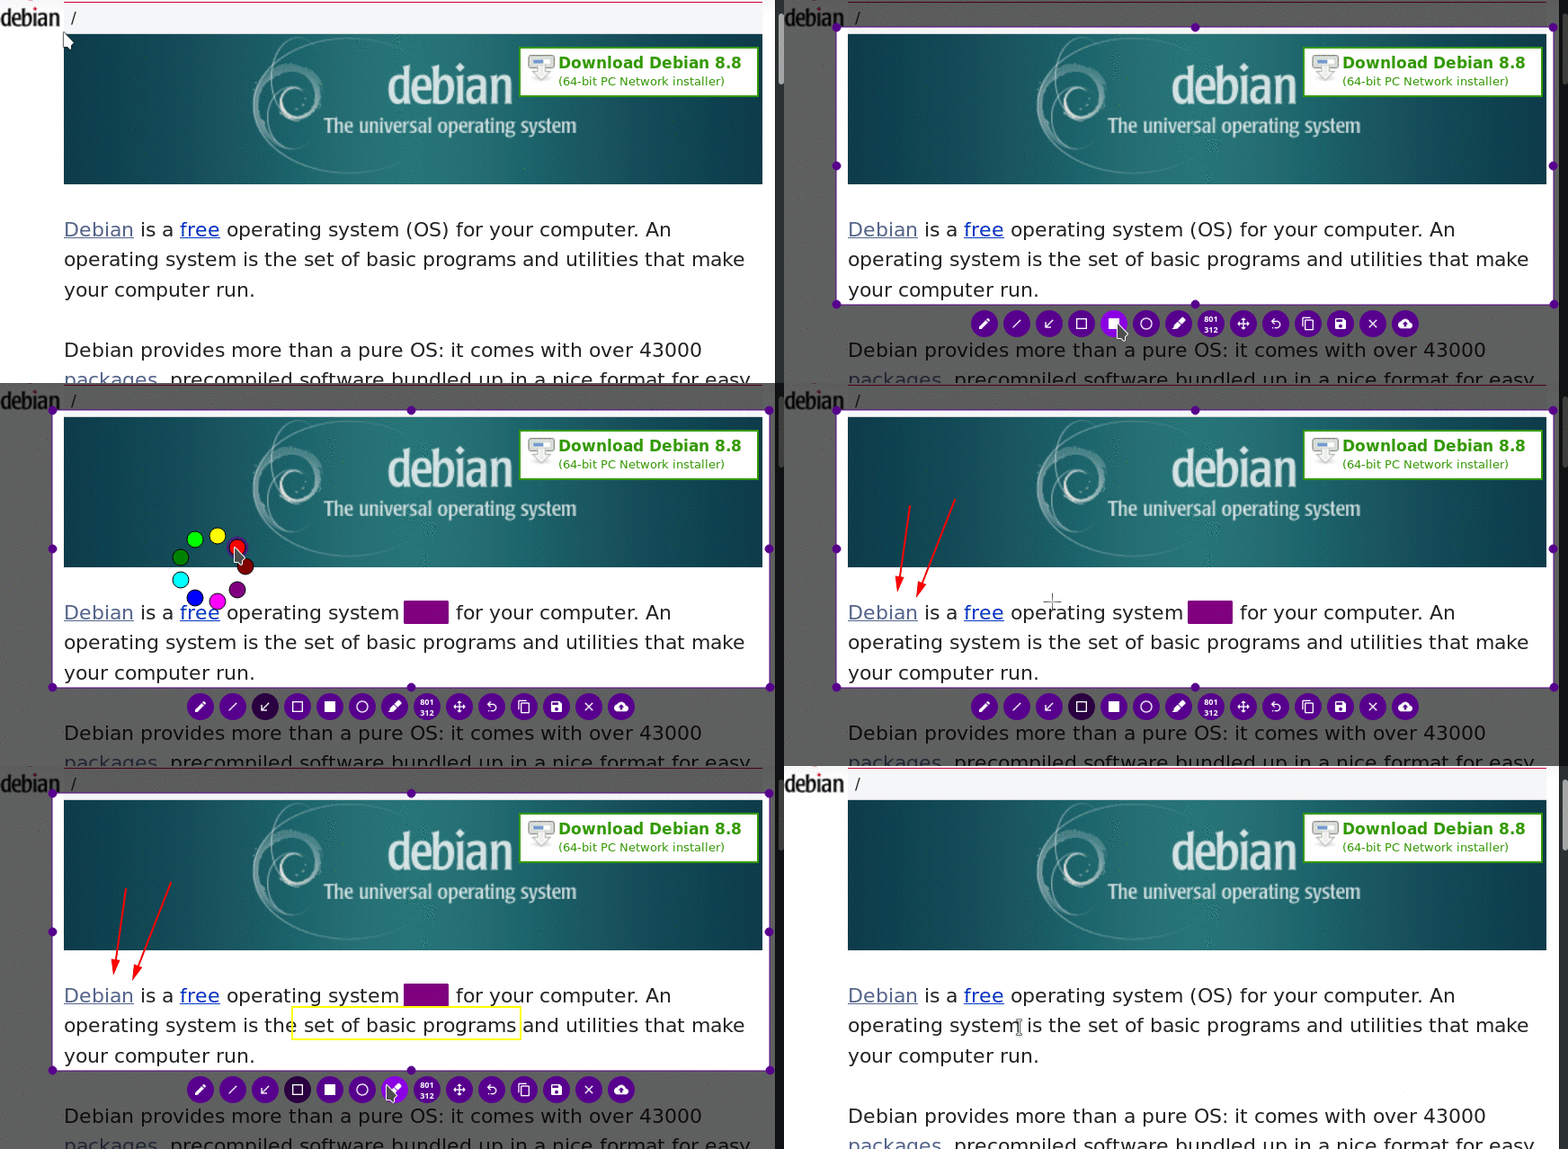
When you press Print-Screen (key: 'prt scn' or 'print' or 'druck') the screen will get a dark overlay and you can select the area you want to screenshot and immediately start editing the image.
Features:
- Adjustable selection
- Copy to clipboard or save to disk
- Highlight or blur parts of the screenshot
- Place markings such as arrows, circles and rectangles on the image
- Optional direct upload (no account needed) to http://imgur.com to share the screenshot online
command line
For more advanced user, 'scrot' is a command line tool that takes screenshot of either fullscreen, current window or selection area. You can bind this command to the printscreen key if you visit System > Hardware > Keyboard Shortcut and scroll down to the custom keybinds. There you will see the Printscreen function and can edit it to execute one of those:
# Create a screenshot of the entire screen in your home directory with a datetime stamp
scrot ~/%y%m%d_%H%M.png

# Create a screenshot of the current window in your home directory
scrot -ub ~/%y%m%d_%H%M.png

# Opens a selection tool to select the area to screenshot
scrot -s ~/%y%m%d_%H%M.png
For advanced info on scrot type man scrot in a terminal.
Workflow to put images to the Wiki
- Activate the window to take screenshot of (left mouse click inside window).
- Press
Alt + Print Screen - Save it.
- Default destination is your 'Desktop'. If you already have a file called 'Screenshot.png' there, a number will be appended to the filename.
- Wiki:
- Log into the wiki homepage.
- Select the desired page (view, not edit!!!).
- Click on
Attach File(bottom of the page). - In
File to uplaodselect the file and pressUpload. - Copy the command
screenshot.pngto the clipboard. - Edit the page: choose Text mode not 'GUI Mode'!
- Insert the command
screenshot.png. Replacewith{{andwith}} - Save the work.